'2008/01/29'에 해당되는 글 150건

  1. 2008.01.29 링크 한번으로 창 무한대 열기.(두개 이상)
  2. 2008.01.29 새창을 페이지 로딩시 원하는 시간에 띄우고 닫게하자.
  3. 2008.01.29 갤러리 꾸미기 2 (아래 두개 합친거.. 배너광고없는 갤러리방을 만들어보세요.)
  4. 2008.01.29 이미지에 마우스 오버시 레이어창(풍선도움말)
  5. 2008.01.29 갤러리 꾸미기 1 (이미지 원래의 크기로 새창이 열립니다)
  6. 2008.01.29 재생중인 곡목표시 및 랜덤 음악듣기
  7. 2008.01.29 HTML소스를 특수문자로 바꿔줍니다.
  8. 2008.01.29 html,script등을 전부 암호화 해줍니다
  9. 2008.01.29 글자를 숫자로 변환시켜 주는 스크립트입니다.
  10. 2008.01.29 커플홈에 유용한 날짜계산 스크립트~♡
  11. 2008.01.29 페이지 이동 태그
  12. 2008.01.29 프레임없이 주소창의 페이지경로 감추기
  13. 2008.01.29 팝업창 기능별 옵션 적용해서 새창 띄우기..
  14. 2008.01.29 음악파일을 랜덤하게 듣기
  15. 2008.01.29 시작 날짜를 알려주는 소스
  16. 2008.01.29 클릭하면 아래로 스스륵 나타나는 공지창
  17. 2008.01.29 메뉴타입만들기
  18. 2008.01.29 마우스를 따라다니는 글이나 이미지
  19. 2008.01.29 현재의 년,월,일,시간 나타내기
  20. 2008.01.29 브라우저 크기를 절대 조절 못하게합니다.
  21. 2008.01.29 텍스트가 멀티로 보인다.
  22. 2008.01.29 트렌제이션 효과 적용되는 버튼
  23. 2008.01.29 지구속 문명 [ 지구공동설 ] - 50년만에 드러난 비밀문서
  24. 2008.01.29 지구 속의 또 다른 세상 - 지구공동설
  25. 2008.01.29 '피겨요정' 김연아, '무한도전' 만난다
  26. 2008.01.29 배기성, "캔 멤버 모두 나이 두 살씩 내려"
  27. 2008.01.29 14일 올라온 디워 미국관객 반응
  28. 2008.01.29 이수영, 환우들과 함께한 쇼케이스로 화려하게 컴백
  29. 2008.01.29 세계미술계 큰손들 “한국 고흐그림, 3000억에 사겠다”
  30. 2008.01.29 MBC "정준하 하차 현재 고려하지 않는다"
<script>  
function gotourl(){  
for(i=0;i<=gotourl.arguments.length-1;i+=2){  
window.open(gotourl.arguments[i],gotourl.arguments[i+1]);
// 바로 윗 줄 대신 아래걸 사용하면 팝업창의 속성을 지정할 수 있습니다.
// window.open(gotourl.arguments[i],gotourl.arguments[i+1],"toolbar=no, width=350,height=200");  
}
}  
</script>
  
<a href="javascript:gotourl('http://hanmail.net','frame1','http://oxtag.com','frame2','http://orgio.net','frame3')">링크클릭</a>  

frame1~3 아무거나 이름을 정해주시되 같게 해서는 안됩니다.
3개 이상도 되니까 원하는 만큼의 사이트를 써주시면 됨...
Posted by 알 수 없는 사용자
,
페이지 처음 로딩시 원하는 시간에 창을 띄우고 지정한 시간에 자동으로 닫게하는 소스입니다.

<SCRIPT LANGUAGE="JavaScript">
<!--
closetime = 20;  // 창이 띄워진 후 닫을때 까지의 시간을 설정 (초)

function Start(URL, WIDTH, HEIGHT) {
windowprops = "left=50,top=50,width=" + WIDTH + ",height=" + HEIGHT; // 새창을 띄울 위치 지정
preview = window.open(URL, "preview", windowprops);
if (closetime) setTimeout("preview.close();", closetime*1000);
}

function CmtPopup() {
url = "http://oxtag.com";  // 팝업창의 주소
width = 400;  // 윈도우의 가로크기
height = 350; // 윈도우의 높이
delay = 5;    // 페이지 로딩시 몇초 후에 열리게 할것인가를 설정 합니다

timer = setTimeout("Start(url, width, height)", delay*1000);
}
// -->
</script>

위의 소스를 <HEAD>부분에 삽입한 다음...
<BODY>부분에 OnLoad="CmtPopup();"을 삽입하세요.
Posted by 알 수 없는 사용자
,


http://oxtag.com/html/ex/layer_popup/gallery.html


<html>
<head>
<title>♡ 카멜롯™의 소스천국 태그피아 ♡</title>

<script language="javascript" src=auto_size.js></script>

</head>
<body>

<div ID="viewDIV" STYLE="position:absolute; visibility:hide;"></div>
<script language="javascript" src=layer_popup.js></script>


<center><font style=font-size:9pt;color:ff9900>마우스를 좌/우측 이미지에 올려보세요.<br>그리구 클릭두 하시구요. 갤러리 게시판과 똑 같죠...^^*</font>
<table align="center" border="1" cellspacing="0" width="225" height="300" bordercolor="gray" bordercolordark="white" bordercolorlight="gray">
    <tr>
        <td width="320" align="center">
            <a href="javascript:view('../../../zboard/data/gallery/ani_42.jpg')" onMouseOver="viewon('잠자구 있는 소녀. 누군지 머름... ㅡㅡa', 1); return true;" onMouseOut="viewoff(); return true;" onfocus="this.blur()"><img src=../../../zboard/data/gallery/ani_42.jpg width=75 height=100 border=0 new_win.focus()">
        </td>
        <td width="320" align="center">
            <a href="javascript:view('../../../zboard/data/gallery/ani_43.jpg')" onMouseOver="viewon('활짝 웃고 있는 소녀 얘더 누군지 머름.', 0); return true;" onMouseOut="viewoff(); return true;" onfocus="this.blur()"><img src=../../../zboard/data/gallery/ani_43.jpg width=75 height=100 border=0 new_win.focus()">
        </td>
        <td width="320" align="center">
            <a href="javascript:view('../../../zboard/data/gallery/ani_44.jpg')" onMouseOver="viewon('멀라', 0); return true;" onMouseOut="viewoff(); return true;" onfocus="this.blur()"><img src=../../../zboard/data/gallery/ani_44.jpg width=75 height=100 border=0 new_win.focus()">
        </td>
        <td width="320" align="center">
            <a href="javascript:view('../../../zboard/data/kiss_13.jpg')" onMouseOver="viewon('K.I.S.S.', 2); return true;" onMouseOut="viewoff(); return true;" onfocus="this.blur()"><img src=../../../zboard/data/kiss_13.jpg width=75 height=100 border=0 new_win.focus()">
        </td>
    </tr>
    <tr>
        <td width="320" align="center">
            <a href="javascript:view('../../../zboard/data/kiss_8.jpg')" onMouseOver="viewon('키스장면', 1); return true;" onMouseOut="viewoff(); return true;" onfocus="this.blur()"><img src=../../../zboard/data/kiss_8.jpg width=75 height=100 border=0 new_win.focus()">
        </td>
        <td width="320" align="center">
            <a href="javascript:view('../../../zboard/data/kiss_7.jpg')" onMouseOver="viewon('이것두 키스장면', 0); return true;" onMouseOut="viewoff(); return true;" onfocus="this.blur()"><img src=../../../zboard/data/kiss_7.jpg width=75 height=100 border=0 new_win.focus()">
        </td>
        <td width="320" align="center">
            <a href="javascript:view('../../../zboard/data/kiss_9.jpg')" onMouseOver="viewon('요것두 키스장면', 0); return true;" onMouseOut="viewoff(); return true;" onfocus="this.blur()"><img src=../../../zboard/data/kiss_9.jpg width=75 height=100 border=0 new_win.focus()">
        </td>
        <td width="320" align="center">
            <a href="javascript:view('../../../zboard/data/kiss_6.jpg')" onMouseOver="viewon('계속 키스장면', 2); return true;" onMouseOut="viewoff(); return true;" onfocus="this.blur()"><img src=../../../zboard/data/kiss_6.jpg width=75 height=100 border=0 new_win.focus()">
        </td>
    </tr>
    <tr>
        <td width="320" align="center">
            <a href="javascript:view('../../../zboard/data/kiss_29.gif')" onMouseOver="viewon('흠냐 키스장면', 1); return true;" onMouseOut="viewoff(); return true;" onfocus="this.blur()"><img src=../../../zboard/data/kiss_29.gif width=75 height=100 border=0 new_win.focus()">
        </td>
        <td width="320" align="center">
            <a href="javascript:view('../../../zboard/data/kiss_26.jpg')" onMouseOver="viewon('쪕 계속 키스장면', 0); return true;" onMouseOut="viewoff(); return true;" onfocus="this.blur()"><img src=../../../zboard/data/kiss_26.jpg width=75 height=100 border=0 new_win.focus()">
        </td>
        <td width="320" align="center">
            <a href="javascript:view('../../../zboard/data/kiss_25.jpg')" onMouseOver="viewon('어라 키스장면이당!', 0); return true;" onMouseOut="viewoff(); return true;" onfocus="this.blur()"><img src=../../../zboard/data/kiss_25.jpg width=75 height=100 border=0 new_win.focus()">
        </td>
        <td width="320" align="center">
            <a href="javascript:view('../../../zboard/data/kiss_21.jpg')" onMouseOver="viewon('흠.. 키스장면', 2); return true;" onMouseOut="viewoff(); return true;" onfocus="this.blur()"><img src=../../../zboard/data/kiss_21.jpg width=75 height=100 border=0 new_win.focus()">
        </td>
    </tr>
</table>


</body>
</html>

Posted by 알 수 없는 사용자
,

http://oxtag.com/html/ex/layer_popup/layer_popup.html

아래 소스 무자게 길죠. 미리보기 클릭해서 소스를 보시면 js파일로 짧게 만들어진게 보일겁니다.
이렇게 하시면 관리하기가 쉽겠죠.


<div ID="viewDIV" STYLE="position:absolute; visibility:hide;"></div>
<script language="javascript">

////////////////////////////////////////////////////////////////////////////////////
// CONFIGURATION
////////////////////////////////////////////////////////////////////////////////////

var fcolor = "#FFF6F3";        // Main background color
var textcolor = "#621414";        // Text color
var border_size = "1";                // border size, 1-3
var border_color = "#621414";        // Border color
var width = "200";                // 팝업 박스의 넓이, 100 - 300
       
////////////////////////////////////////////////////////////////////////////////////
// END CONFIGURATION
////////////////////////////////////////////////////////////////////////////////////

////////////////////////////////////////////////////////////////////////////////////
// END CONFIGURATION
////////////////////////////////////////////////////////////////////////////////////

ns4 = (document.layers)? true:false
ie4 = (document.all)? true:false

// Microsoft Stupidity Check.
if (ie4) {
        if (navigator.userAgent.indexOf('MSIE 5')>0) {
                ie5 = true;
        } else {
                ie5 = false; }
} else {
        ie5 = false;
}

var x = 0;
var y = 0;
var offsetx = 10;
var offsety = 10;
var popup_on = 0;
var palign = 0;                // Default 팝업 박스의 위치, 0:center/1:right/2:left

if ( (ns4) || (ie4) ) {
        if (ns4) over = document.viewDIV
        if (ie4) over = viewDIV.style
        document.onmousemove = mouseMove
        if (ns4) document.captureEvents(Event.MOUSEMOVE)
}

// Clears popups if appropriate
function viewoff() {
        if ( (ns4) || (ie4) ) {
                popup_on = 0;
                hideObject(over);
        }
        palign = 0        
}

// Non public functions. These are called by other functions etc.

// Simple popup
function viewon(text, left) {
        txt = "<TABLE WIDTH="+width+" BORDER=0 CELLPADDING="+border_size+" CELLSPACING=0 BGCOLOR=\""+border_color+"\"><TR><TD><TABLE WIDTH=100% BORDER=0 CELLPADDING=2 CELLSPACING=0 BGCOLOR=\""+fcolor+"\"><TR><TD><FONT style=\"font-size:10pt;font-family:웹정\" COLOR=\""+textcolor+"\" SIZE=\"10pt\">"+text+"</FONT></TD></TR></TABLE></TD></TR></TABLE>"
        layerWrite(txt);
        if(left) palign = left;
        disp(palign);
}

// Common calls
function disp(palign) {
        if ( (ns4) || (ie4) ) {
                if (popup_on == 0)         {
                        if (palign == 0) { // Center
                                moveTo(over,x+offsetx-(width/2),y+offsety);
                        }
                        if (palign == 1) { // Right
                                moveTo(over,x+offsetx,y+offsety);
                        }
                        if (palign == 2) { // Left
                                moveTo(over,x-offsetx-width,y+offsety);
                        }
                        showObject(over);
                        popup_on = 1;
                }
        }
// Here you can make the text goto the statusbar.
}

// Moves the layer
function mouseMove(e) {
        if (ns4) {x=e.pageX; y=e.pageY;}
        if (ie4) {x=event.x; y=event.y;}
        if (ie5) {x=event.x+document.body.scrollLeft; y=event.y+document.body.scrollTop;}
        if (popup_on) {
                if (palign == 0) { // Center
                        moveTo(over,x+offsetx-(width/2),y+offsety);
                }
                if (palign == 1) { // Right
                        moveTo(over,x+offsetx,y+offsety);
                }
                if (palign == 2) { // Left
                        moveTo(over,x-offsetx-width,y+offsety);
                }
        }
}

// Writes to a layer
function layerWrite(txt) {
        if (ns4) {
                var lyr = document.viewDIV.document
                lyr.write(txt)
                lyr.close()
        }
        else if (ie4) document.all["viewDIV"].innerHTML = txt
}

// Make an object visible
function showObject(obj) {
        if (ns4) obj.visibility = "show"
        else if (ie4) obj.visibility = "visible"
}

// Hides an object
function hideObject(obj) {
        if (ns4) obj.visibility = "hide"
        else if (ie4) obj.visibility = "hidden"
}

// Move a layer
function moveTo(obj,xL,yL) {
        obj.left = xL
        obj.top = yL
}

</script>


<img onMouseOver="viewon('러브히나', 1); return true;" onMouseOut="viewoff(); return true;" onfocus="this.blur()" src=http://oxtag.com/zboard/data/gallery/ani_나루58.jpg width=75 height=100 border=0 new_win.focus()">
<img onMouseOver="viewon('러브히나', 0); return true;" onMouseOut="viewoff(); return true;" onfocus="this.blur()" src=http://oxtag.com/zboard/data/gallery/ani_나루58.jpg width=75 height=100 border=0 new_win.focus()">
<img onMouseOver="viewon('러브히나', 2); return true;" onMouseOut="viewoff(); return true;" onfocus="this.blur()" src=http://oxtag.com/zboard/data/gallery/ani_나루58.jpg width=75 height=100 border=0 new_win.focus()">

viewon('러브히나', 0);  - 레이어 창이 마우스 중앙에 나타남
viewon('러브히나', 1);  - 레이어 창이 마우스 오른쪽에 나타남
viewon('러브히나', 2);  - 레이어 창이 마우스 좌측에 나타남
Posted by 알 수 없는 사용자
,

http://oxtag.com/html/ex/layer_popup/img_autosize_win.html

겔러리 게시판에서 이미지를 클릭하면 지가 알아서 이미지 사이즈에 맞게 새창이 띄워지죠.
요건 다른겁니다. 미리보기는 위 링크를 클릭하세요. 추천 할만한 소스라는....

<html>  
<head>  
<script language="javascript">  

function view(what) {  
var imgwin = window.open("",'WIN','scrollbars=no,status=no,toolbar=no,resizable=1,location=no,menu=no,width=10,height=10');  
imgwin.focus();  
imgwin.document.open();  
imgwin.document.write("<html>");  
imgwin.document.write("<head>");  
imgwin.document.write("<title>**</title>");  

imgwin.document.write("<sc"+"ript>\n");  
imgwin.document.write("function resize() {\n");  
imgwin.document.write("pic = document.il;\n");  
//imgwin.document.write("alert(eval(pic).height);\n");  
imgwin.document.write("if (eval(pic).height) { var name = navigator.appName\n");  
imgwin.document.write("  if (name == 'Microsoft Internet Explorer') { myHeight = eval(pic).height + 40; myWidth = eval(pic).width + 12;\n");  
imgwin.document.write("  } else { myHeight = eval(pic).height + 9; myWidth = eval(pic).width; }\n");  
imgwin.document.write("  clearTimeout();\n");  
imgwin.document.write("  var height = screen.height;\n");  
imgwin.document.write("  var width = screen.width;\n");  
imgwin.document.write("  var leftpos = width / 2 - myWidth / 2;\n");  
imgwin.document.write("  var toppos = height / 2 - myHeight / 2; \n");  
imgwin.document.write("  self.moveTo(leftpos, toppos);\n");  
imgwin.document.write("  self.resizeTo(myWidth, myHeight);\n");  
imgwin.document.write("}else setTimeOut(resize(), 100);}\n");  
imgwin.document.write("</sc"+"ript>");  

imgwin.document.write("</head>");  
imgwin.document.write('<body topmargin="0" leftmargin="0" marginheight="0" marginwidth="0" bgcolor="#FFFFFF">');  

imgwin.document.write("<a href=# onclick=window.close() onfocus=this.blur()><img border=0 src="+what+" xwidth=100 xheight=9 name=il onload='resize();'></a>");  
imgwin.document.write("</body>");  
imgwin.document.close();  

}  


</script>  
</head>  
<body topmargin="0" leftmargin="0" marginheight="0" marginwidth="0" bgcolor="#FFFFFF">
 
<center>  <br><br><font style=font-size:9pt;color:ff9900>아래 이미지를 각각 클릭해보세요.</font><br><br>
<a href="javascript:view('../../zboard/data/gallery/ani_42.jpg')" onfocus=this.blur()><img src=../../zboard/data/gallery/ani_42.jpg border=0 width=50 height=100></a>  
<a href="javascript:view('../../zboard/data/gallery/kiss.jpg')" onfocus=this.blur()><img src=../../zboard/data/gallery/kiss.jpg border=0 width=50 height=100></a>
<a href="javascript:view('../../zboard/data/kiss_21.jpg')" onfocus=this.blur()><img src=../../zboard/data/kiss_21.jpg border=0 width=50 height=100></a>
<a href="javascript:view('../../zboard/data/puppy_3.jpg')" onfocus=this.blur()><img src=../../zboard/data/puppy_3.jpg border=0 width=50 height=100></a>  
</center>  
</body>
</html>

Posted by 알 수 없는 사용자
,

http://oxtag.com/html/ex/embed_random.html

예제 처럼 wma asf mid등 윈도우 미디어가 지원하는 음악화일 모두 가능합니다..
위 미리보기 링크를 클릭하세요.

<body>와 </body> 사이의 제목을 표시할 부분에 아래 소스를 넣습니다.

<script language="JavaScript">
song = new Array(3);
song[0] = '../music/wma/cannon.wma'
song[1] = '../music/asf/pocketED.asf'
song[2] = '../music/midi/k_midi/k414.mid'

title = new Array(3);
title[0] = '보이소프라노 합창단 - 캐논'
title[1] = '포켓몬스터'
title[2] = '파란 - 코요테'

index = Math.floor(Math.random() * song.length);
document.write("<embed src="+song[index]+" autostart=true hidden=true>");
document.write(title[index]);

</script>

3은 음악의 갯수(여기서는 3개 사용했으므로, 3을 적었습니다)
song[0 + n] = '배경음악 경로' 는 배경음악으로 사용할 음의화일의 경로및 이름
title[0 + n] = '배경음악제목' 는 음악의 제목

음악의 갯수는 같은 방법으로 추가하거나 뺄 수 있습니다.
Posted by 알 수 없는 사용자
,

http://oxtag.com/html/ex/cording_html.html

<!-- BODY 부분에 아래의 스크립트를 복사해 넣으세요-->

<CENTER>
<textarea style="width:400;height:200" name="n1">
샘플 :
<html>
<body>
</body>
</html>
</textarea><br>
<input type="button" onclick="txt=document.all.n1.value;hh()" value="OK"></CENTER>

<script>
txt="";txt2="";txt3="";num=0
function hh(){
document.all.n1.value=Math.floor(num/txt.length*100)+"%"
txt3=txt.charAt(num)
if(txt3 == " "){txt3=" "};if(txt3 == "&"){txt3="&"};if(txt3 == "\""){txt3="""};if(txt3 == "<"){txt3="<"};if(txt3 == ">"){txt3=">"}
txt2=txt2+txt3
num++;if(num != txt.length){setTimeout("hh()",1)};else{document.all.n1.value=txt2}
}
</script>
Posted by 알 수 없는 사용자
,
http://oxtag.com/html/ex/encrypter.html

이 소스는 힘들게 만들어놓은 홈페이지의 html,script등을 전부 암호화 해줍니다.
더 획기적인 기능은 상대방이 암호화 해놓은 소스를 디코딩(해독)까지 할수 있다는겁니다.

<html>
<head>
<title>Source Code Encrypter</title>
</head>
<script language=JavaScript>
<!--
//////////////////////////////////////////////////////////////////
// Source Code Encrypter v1.0 //
//////////////////////////////////////////////////////////////////
// //
// This JavaScript can be freely used as long as this message //
// stays here in the header of the script. Any modifications //
// and bugs found (and fixed) are appreciated. //
// Script submitted/featured on Dynamicdrive.com //
// Visit http://www.dynamicdrive.com for source code //
// Svetlin Staev, thewebmonster@altavista.com //
//////////////////////////////////////////////////////////////////

var i=0;
var ie=(document.all)?1:0;
var ns=(document.layers)?1:0;

function initStyleElements() /* Styles for Buttons Init */
{
var c = document.pad;
if (ie)
{
//c.text.style.backgroundColor="#DDDDDD";
c.compileIt.style.backgroundColor="#C0C0A8";
c.compileIt.style.cursor="hand";
c.select.style.backgroundColor="#C0C0A8";
c.select.style.cursor="hand";
c.view.style.backgroundColor="#C0C0A8";
c.view.style.cursor="hand";
c.retur.style.backgroundColor="#C0C0A8";
c.retur.style.cursor="hand";
c.clear.style.backgroundColor="#C0C0A8";
c.clear.style.cursor="hand";
}
else return;
}

/* Buttons Enlightment of "Compilation" panel */
function LightOn(what)
{
if (ie) what.style.backgroundColor = '#E0E0D0';
else return;
}
function FocusOn(what)
{
if (ie) what.style.backgroundColor = '#EBEBEB';
else return;
}
function LightOut(what)
{
if (ie) what.style.backgroundColor = '#C0C0A8';
else return;
}
function FocusOff(what)
{
if (ie) what.style.backgroundColor = '#DDDDDD';
else return;
}
/* Buttons Enlightment of "Compilation" panel */

function generate() /* Generation of "Compilation" */
{
code = document.pad.text.value;
if (code)
{
document.pad.text.value='Compiling...Please wait!';
setTimeout("compile()",1000);
}
else alert('First enter something to compile and then press CompileIt')
}
function compile() /* The "Compilation" */
{
document.pad.text.value='';
compilation=escape(code);
document.pad.text.value="<script>\n<!--\ndocument.write(unescape(\""+compilation+"\"));\n//-->\n<\/script>";
i++;
if (i=1) alert("Page compiled 1 time!");
else alert("Page compiled "+i+" times!");
}
function selectCode() /* Selecting "Compilation" for Copying */
{
if(document.pad.text.value.length>0)
{
document.pad.text.focus();
document.pad.text.select();
}
else alert('Nothing for be selected!')
}
function preview() /* Preview for the "Compilation" */
{
if(document.pad.text.value.length>0)
{
pr=window.open("","Preview","scrollbars=1,menubar=1,status=1,width=700,height=320,left=50,top=110");
pr.document.write(document.pad.text.value);
}
else alert('Nothing for be previewed!')
}
function uncompile() /* Decompiling a "Compilation" */
{
if (document.pad.text.value.length>0)
{
source=unescape(document.pad.text.value);
document.pad.text.value=""+source+"";
}
else alert('You need compiled code to uncompile it!')
}
// -->
</script>
<body bgcolor=white topmargin=0 leftmargin=0 marginheight=0 marginwidth=0 onload=initStyleElements()>
<table border=0 width=100% cellspacing=0 cellpadding=0>
<tr>
<td width=100% height="23"></td>
</tr>
<tr>
<td width=100% height=23></td>
</tr>
<tr>
<td width=100%>

<!-- Compilation Panel -->
<form method=post name=pad align=center>
<textarea rows=11 name=text cols=58 style="background-color:#EBEBEB;width:95%"></textarea><br>
<input type=button value=Encrypt name=compileIt onClick=generate() onMouseOver=LightOn(this) onMouseOut=LightOut(this)>
<input type=button value=Select name=select onClick=selectCode() onMouseOver=LightOn(this) onMouseOut=LightOut(this)>
<input type=button value=Preview name=view onClick=preview() onMouseOver=LightOn(this) onMouseOut=LightOut(this)>
<input type=button value=Source name=retur onClick=uncompile() onMouseOver=LightOn(this) onMouseOut=LightOut(this)>
<input type=reset value=Clear name=clear onMouseOver=LightOn(this) onMouseOut=LightOut(this)>
</form>
<!-- Compilation Panel -->

</td>
</tr>
<tr><td>
사용법:일단 암호화할 소스를 넣습니다....암호화 하기위해서는 Encrypt를 누루면 됩니다. <br>
버튼설명을 하자면... <br>
Encrypt- 암호화 <br>
Select - 전체선택 <br>
Preview- 미리보기 <br>
Source -원래소스 <br>
Clear  - 다지우기 <br>
순입니다...자세한 설명은 안드려도 될것 같군요.....그럼..</td></tr>
</table>
</body>
</html>
Posted by 알 수 없는 사용자
,
http://oxtag.com/html/ex/encryptform.html

이 소스는 일반글자를 숫자로 변환 또는 변환된 숫자를 글자로 재변환
해주는 스크립터입니다.
한예로 보안을 요하는 메일을 보낼시에 글자를 숫자로 변환시켜서
보내고 받는분이 이 스크립터를 이용하여서 본다면 다른사람들이
메일의 내용을 보아도 무슨내용인지 모르겠지요..
이 소스도 잘 응용하면 홈피의 기능에 많은 도움이 될수 있을거라 여겨집니다.

<html>
<HEAD>
<title> ♡ 카멜롯™의 태그피아 ♡ </title>
<SCRIPT LANGUAGE="JavaScript">
<!-- Original:  Mike McGrath (mike_mcgrath@lineone.net) -->
<!-- Web Site:  http://website.lineone.net/~mike_mcgrath/ -->

<!-- This script and many more are available free online at -->
<!-- The JavaScript Source!! http://javascript.internet.com -->

<!-- Begin
var str_in;
var str_out = "";
var num_in;
var num_out = "";
var e = "텍스트를 입력하세요!";

function str_to_num(form) {
num_out = "";
if(form.input.value == "") alert(e);
else {
str_in = escape(form.input.value);
for(i = 0; i < str_in.length; i++) {
num_out += str_in.charCodeAt(i) - 23;
}
form.output.value = num_out;
form.input.value = "";
   }
}

function num_to_str(form) {
str_out = "";
if(form.output.value == "") alert(e)
else {
num_out = form.output.value;  
for(i = 0; i < num_out.length; i += 2) {
num_in = parseInt(num_out.substr(i,[2])) + 23;
num_in = unescape('%' + num_in.toString(16));
str_out += num_in;
}
form.input.value = unescape(str_out);
form.output.value = "";
   }
}
//  End -->
</script>
</HEAD>

<!-- STEP TWO: Copy this code into the BODY of your HTML document  -->

<BODY>

<center>
<form name=encryptform>
<table>
<tr>
<td align=center>원래 문장</td>
<td> </td>
<td align=center>암호화 코드</td>
</tr>
<tr>
<td align=center><input name=input type=text size=40 value="태그피아"></td>
<td align=center>
<input type=button value="<--" onClick="javascript:num_to_str(this.form)"><br>
<input type=button value="-->" onClick="javascript:str_to_num(this.form)">
</td>
<td align=center><input name=output type=text size=40></td>
</tr>
</table>
</form>
</center>
<center><br><br><br><br><br>어느 문장이던 왼 쪽 텍스트 줄에 입력해 놓고 아래 버튼을 눌러 보세요... 반대로도 버튼을 눌러 보시구요.<br>원래의 문장을 암호화 하는 것이며 암호화된 코드를 원래의 문장으로 해독도 해 주는 스크립트입니다.<br>
친구나 이성간에 서로 이 스크립트로 비밀 메일을 보낼 수도 있겠죠?<br><br><br><br><br>
</body>
</html>
Posted by 알 수 없는 사용자
,
http://oxtag.com/html/ex/date1.html
미리보기를 보시면 별루 안이쁘죠. 스타일을 홈에 맞게 꾸며서 사용하세요.

<script language="JavaScript">
var today = new Date();
var meetday = new Date("04-01-2000");//이부분에 만난날짜를 수정해주세요^^
var days = Math.ceil((today-meetday)/24/60/60/1000);
days=days-1
</script>
<script language="JavaScript">
var today = new Date();
var meetday = new Date("04-04-2000");//이부분에 사귄날짜를 수정해주세요^^
var nals = Math.ceil((today-meetday)/24/60/60/1000);
nals=nals-1
</script>
<script language="JavaScript">
var today = new Date();
var y2 = new Date("Jan, 26, 2001"); //만난지 300일째 되는날
var aa = y2.getTime();
var bb = today.getTime();
var day100 = Math.ceil((aa-bb)/24/60/60/1000);
</script>
<script language="JavaScript">
var today = new Date();
var y2 = new Date("April, 1, 2001"); //1년 되는날
var aa = y2.getTime();
var bb = today.getTime();
var year1 = Math.ceil((aa-bb)/24/60/60/1000);
</script>
<script language="JavaScript">
var today = new Date();
var y2 = new Date("Dec, 27, 2002"); //1000day 되는날
var aa = y2.getTime();
var bb = today.getTime();
var day1000 = Math.ceil((aa-bb)/24/60/60/1000);
</script>
<script language="JavaScript">
var today = new Date();
var y2 = new Date("April, 1, 2010"); //10년 되는날
var aa = y2.getTime();
var bb = today.getTime();
var year10 = Math.ceil((aa-bb)/24/60/60/1000);
</script>
<script language="JavaScript">
var today = new Date();
var y2 = new Date("Feb, 15, 2001"); //생일날짜를 수정해주세요^^
var aa = y2.getTime();
var bb = today.getTime();
var birth1 = Math.ceil((aa-bb)/24/60/60/1000);
</script>
<script language="JavaScript">
var today = new Date();
var y2 = new Date("March, 9, 2001"); //생일날짜를 수정해주세요^^
var aa = y2.getTime();
var bb = today.getTime();
var birth2 = Math.ceil((aa-bb)/24/60/60/1000);
</script>
</head>

<body style="margin:0px;">

<SCRIPT LANGUAGE="JavaScript">
<!--
var today = new Date();
var year = today.getYear();
if (year < 2000) year+=1900;
var month = today.getMonth();
var date = today.getDate();
document.write("  ▷ 오늘은 "+year+ "년 "  + (month+1) + "월 " + date + "일 입니다.");
//현재 날짜를 표시하는 스크립트 -->
</SCRIPT>
<br>
<script language="JavaScript">
document.write("  ▷ 우리는 만난지 " + days + "일 되었습니다.")
</script>

<BR>
<script language="JavaScript">
document.write("  ▷ 300일이 되는 날은 " +   day100   + "일 남았습니다.") //300일
</script>
<br>

<script language="JavaScript">
document.write("  ▷ 1년이 되는 날은 " +   year1   + "일 남았습니다.") //1년
</script>
<br>

<script language="JavaScript">
document.write("  ▷ 1000일이 되는 날은 " +   day1000   + "일 남았습니다.") //1년
</script>
<br>

<script language="JavaScript">
document.write("  ▷ 10년이 되는 날은 " +   year10   + "일 남았습니다.") //10년
</script>
<br>

<script language="JavaScript">
document.write("  ▷ 제 생일은 " +   birth1   + "일 남았습니다.") //생일날짜나 기념일등을 적어보세요.
</script>
<br>
<script language="JavaScript">
document.write("  ▷ 그녀 생일은 " +   birth2   + "일 남았습니다.")
//생일날짜나 기념일등을 적어보세요.
</script>
Posted by 알 수 없는 사용자
,
<Script language="JavaScript">
location.replace('URL');
</Script>
Posted by 알 수 없는 사용자
,
자바스크립트를 이용해서 기존의 홈페이지 구성을 그대로 두고 간단하게
프레임없이 프레임처럼 사용하여 주소창의 페이지경로와 파일명을 숨겨보도록 하겠습니다.

1. 우선 홈페이지의 첫문서(보통 index.xxx 가 되겠지요)에 다음의 스크립트를 삽입

------------------------------------------------------------
<SCRIPT LANGUAGE="JavaScript">
function Frameset(page) {
framecode = "<frameset rows='1*'>"
+ "<frame name=main src='" + page + "'>"
+ "</frameset>";

page = window.open("");
page.document.open();
page.document.write(framecode);
page.document.close();
}
</script>
------------------------------------------------------------

2. 첫문서 내의 모든 링크를 다음과 같이 지정합니다.

------------------------------------------------------------
<a href="javascript:Frameset('경로/파일')">링크</a>
------------------------------------------------------------

3. 이외의 페이지나 프로그램에서는 그냥 사용하던대로 일반 링크를 사용하면 됩니다.

* 위의 자바스크립트를 응용하면 다양한 트릭을 쓰실수 있습니다. 조금만 생각해보면
응용방법이 보입니다.

* 아! 한가지를 잊었군요. 위의 경우는 새창을 띄웁니다. 새창을 안띄우고 현재페이에서
그대로 링크가 넘어가려면 이렇게 하시면 됩니다.

------------------------------------------------------------
page = window.open("");
page.document.open();
page.document.write(framecode);
page.document.close();


document.write(framecode);
document.close();
게 수정하시면 됩니다.
------------------------------------------------------------


주소창 경로 변하지 안게하는 다른 방법입니다.


주소창의 파일 경로 숨기기  
   
보통 홈피를 운영할때 프레임을 사용하지 않으면 링크시 페이지 경로와 페이지명이
브라우져의 주소창에 지저분하게 나타납니다. 그 경로와 페이지를 감추는 방법을 알려드립니다.

우선 네티즌이 처음 찾게되는 index.html을 다음과 같이 작성합니다.

첫번째, 프레임으로 나누는것이 아닌데 단독페이지를 프레임처럼 설정합니다.

<html>
<head>
<title>♡카멜롯™의 소스천국 태그피아♡</title>
<frameset rows="1*">
    <frame name="main" src="보여줄 페이지">
    <noframes>
    <body bgcolor="white" text="black" link="blue" vlink="purple" alink="red">

    <p>이 페이지를 보려면, 프레임을 볼 수 있는 브라우저가 필요합니다.</p>
    </body>
    </noframes>
</frameset>
</html>

이렇게하면 단독페이지가 main이라는 프레임명으로 프레임처럼 사용되며 경로나 페이지명이
주소창에 나타나지 않습니다.  기본타겟은 당근 main이겠죠.


두번째는 프레임을 나누었지만 크기를 0으로 잡기 때문에 보이지 않게 됩니다.

<html>
<head>
<title>♡카멜롯™의 소스천국 태그피아♡</title>
</head>
<frameset rows="*%, 100%" border="0">
    <frame noresize scrolling="no" marginwidth="0" marginheight="0">
    <frame src="보여줄 페이지" name="main" marginwidth="0" marginheight="0">
    <noframes>
    <body>
    <p>이 페이지를 보려면, 프레임을 볼 수 있는 브라우저가 필요합니다.</p>
    </body>
    </noframes>
</frameset>
</html>


이것두 기본 타겟이 main이라는 프레임명으로 사용되며 경로나 페이지명이 주소창에 나타나지 않습니다.
Posted by 알 수 없는 사용자
,
<html>
<head>
<title>♡Camelot의 소스천국 태그피아♡</title>

</head>
<body>


<SCRIPT LANGUAGE="JavaScript">
<!-- Begin
function customize(form) {    
var address = document.form1.url.value;  
var op_tool  = (document.form1.tool.checked== true)  ? 1 : 0;    
var op_loc_box  = (document.form1.loc_box.checked == true)  ? 1 : 0;    
var op_dir  = (document.form1.dir.checked == true)  ? 1 : 0;    
var op_stat  = (document.form1.stat.checked == true)  ? 1 : 0;    
var op_menu  = (document.form1.menu.checked == true)  ? 1 : 0;    
var op_scroll  = (document.form1.scroll.checked == true)  ? 1 : 0;    
var op_resize  = (document.form1.resize.checked == true)  ? 1 : 0;    
var op_wid  = document.form1.wid.value;  
var op_heigh = document.form1.heigh.value;                
var option = "toolbar="+ op_tool +",location="+ op_loc_box +",directories="
+ op_dir +",status="+ op_stat +",menubar="+ op_menu +",scrollbars="  
+ op_scroll +",resizable="  + op_resize +",width=" + op_wid +",height="+ op_heigh;
var win3 = window.open("", "what_I_want", option);  
var win4 = window.open(address, "what_I_want");
}
function clear(form) {
document.form1.wid.value="";
document.form1.heigh.value="";
}
// End -->
</SCRIPT>
<CENTER>
<br>
<TABLE cellpadding=5 border="1"><TR><TD>
<font face="Verdana" size="2" color="#000000">

<FORM name=form1  ACTION="javascript:" METHOD="POST">
<INPUT TYPE="text" NAME="url" size="25" value="http://hanmail.net" >
<br><INPUT TYPE="checkbox" NAME="tool"> Toolbar (툴바)
<br><INPUT TYPE="checkbox" NAME="loc_box"> Location (주소입력창)
<br><INPUT TYPE="checkbox" NAME="dir"> Directories (바로가기)
<br><INPUT TYPE="checkbox" NAME="stat"> Status (상태표시줄)
<br><INPUT TYPE="checkbox" NAME="menu"> Menubar (메뉴바)
<br><INPUT TYPE="checkbox" NAME="scroll"> Scrollbars (스크롤)
<br><INPUT TYPE="checkbox" NAME="resize"> Resizable (크기조정)
<br>
<br><INPUT TYPE="text"   NAME="wid" size="10" value="800" > Width
<br><INPUT TYPE="text"  NAME="heigh" size="10" value="600"> Height
<br>
<BR><CENTER>
<INPUT TYPE="button" VALUE="ENTER" OnClick="customize(this.form)">
<INPUT TYPE="reset" VALUE="RESET" onClick="clear(this.form)">
<br>
</font>

</center></TD></TR></TABLE>
</FORM>
</CENTER>
</body>
</html>
Posted by 알 수 없는 사용자
,

http://oxtag.com/html/ex/embed_random1.html

먼저 asx파일을 만든다.
메모장을 열고 빈문서에 아래와 같이 asf파일의 주소를 한줄로 적고
갯수와는 상관 없이 적고 확장명을 music1.asx로 저장한다.

http://주소/asf파일명1

위 처럼해서 3개를 만드세요.
아니면 직접 링크를 하셔도 됩니다.

아래 보시면 music1.asx music2.asx music3.asx 파일이 있죠. 이건 미리 만드시거나
링크를 하시면 됩니다.
<script language="JavaScript">
<!--
var ads = 3;
var now = new Date()
var sec = now.getSeconds()
var ad = sec % ads;
ad +=1;
if (ad == 1) { banner='music1.asx'; }
else if (ad == 2) { banner='music2.asx'; }
else if (ad == 3) { banner='music3.asx'; }
document.write('<embed type="video/x-ms-asf-plugin" src="' + banner + '" console="Clip1" controls="PositionSlider" autostart=true hidden=true loop="-1">');
//-->
</script>    


파일을 더 삽입하고자 하신다면 else if (ad == 3) { banner='music3.asx'; } 이부분을 추가하시면 됩니다.
원리는 알겠죠.
Posted by 알 수 없는 사용자
,
<script language="JavaScript">
var now = new Date();
var then = new Date("February 01,2001"); // 처음 날짜를 입력하세요.
var gap = now.getTime() - then.getTime();
gap = Math.floor(gap / (1000 * 60 * 60 * 24));
document.write("오픈한지" + gap + "일 되었습니다.");
</script>
Posted by 알 수 없는 사용자
,
서브메뉴를 아래와 같이 텍스트로 하시면 이쁩니다.
모두 복사해서 태그연습장에서 실행해보세요.

<html>
<head>
        <title>Cross-browser Dynamic HTML Scripts - NewsMenu</title>
<style type="text/css">
DIV.clTopMenu{position:absolute; width:101; height:150; clip:rect(0,101,14,0); visibility:hidden; z-index:31; layer-background-color:#EEEEEE; background-color:#EEEEEE}
DIV.clTopMenuBottom{position:absolute; width:101; height:3; clip:rect(0,101,3,0); top:11; layer-background-color:#CECFCE; background-color:#CECFCE; z-index:2}
DIV.clTopMenuText{position:absolute; width:91; left:5; top:15; font-family:arial,helvetica; font-size:11px; background-color:#EEEEEE; z-index:1}

</style>
<script type="text/javascript" language="JavaScript">
/********************************************************************************
Copyright (C) 1999 Thomas Brattli
This script is made by and copyrighted to Thomas Brattli at www.bratta.com
Visit for more great scripts. This may be used freely as long as this msg is intact!
I will also appriciate any links you could give me.
********************************************************************************/
//Default browsercheck, added to all scripts!
function checkBrowser(){
        this.ver=navigator.appVersion
        this.dom=document.getElementById?1:0
        this.ie5=(this.ver.indexOf("MSIE 5")>-1 && this.dom)?1:0;
        this.ie4=(document.all && !this.dom)?1:0;
        this.ns5=(this.dom && parseInt(this.ver) >= 5) ?1:0;
        this.ns4=(document.layers && !this.dom)?1:0;
        this.bw=(this.ie5 || this.ie4 || this.ns4 || this.ns5)
        return this
}
bw=new checkBrowser()
/********************************************************************************
If you want to change the appearens on the text, background-colors, size or
anything do that in the style tag above.

This menu might not be as easy to adapt to your own site, but please
play around with it before you mail me for help...
****************************************************************************/

/***************************************************************************
Variables to set.
****************************************************************************/

//There are 2 ways these menus can be placed
// 0 = column
// 1 = row
nPlace=0


//How many menus do you have? (remember to copy and add divs in the body if you add menus)
var nNumberOfMenus=2

var nMwidth=101 //The width on the menus (set the width in the stylesheet as well)
var nPxbetween=20 //Pixels between the menus
var nFromleft=10 //The first menus left position
var nFromtop=85 //The top position of the menus
var nBgcolor='#CECFCE' //The bgColor of the bottom mouseover div
var nBgcolorchangeto='#6380BC' //The bgColor to change to
var nImageheight=11 //The position the mouseover line div will stop at when going up!

/***************************************************************************
You shouldn't have to change anything below this
****************************************************************************/
//Object constructor
function makeNewsMenu(obj,nest){
        nest=(!nest) ? '':'document.'+nest+'.'                                        
           this.css=bw.dom? document.getElementById(obj).style:bw.ie4?document.all[obj].style:bw.ns4?eval(nest+"document.layers." +obj):0;                
        this.evnt=bw.dom? document.getElementById(obj):bw.ie4?document.all[obj]:bw.ns4?eval(nest+"document.layers." +obj):0;                        
        this.scrollHeight=bw.ns4?this.css.document.height:this.evnt.offsetHeight
        this.moveIt=b_moveIt;this.bgChange=b_bgChange;
        this.slideUp=b_slideUp; this.slideDown=b_slideDown;
        this.clipTo=b_clipTo;
    this.obj = obj + "Object";         eval(this.obj + "=this")                
}
//Objects methods
function b_moveIt(x,y){this.x=x; this.y=y; this.css.left=this.x; this.css.top=this.y}
function b_bgChange(color){if(bw.dom || bw.ie4) this.css.backgroundColor=color; else this.css.bgColor=color}
function b_clipTo(t,r,b,l){
        if(bw.ns4){this.css.clip.top=t; this.css.clip.right=r; this.css.clip.bottom=b; this.css.clip.left=l
        }else this.css.clip="rect("+t+","+r+","+b+","+l+")";
}
function b_slideUp(ystop,moveby,speed,fn,wh){
        if(!this.slideactive){
                if(this.y>ystop){
                        this.moveIt(this.x,this.y-5); eval(wh)
                        setTimeout(this.obj+".slideUp("+ystop+","+moveby+","+speed+",'"+fn+"','"+wh+"')",speed)
                }else{
                        this.slideactive=false; this.moveIt(0,ystop); eval(fn)
                }
        }
}
function b_slideDown(ystop,moveby,speed,fn,wh){
        if(!this.slideactive){
                if(this.y<ystop){
                        this.moveIt(this.x,this.y+5); eval(wh)
                        setTimeout(this.obj+".slideDown("+ystop+","+moveby+","+speed+",'"+fn+"','"+wh+"')",speed)
                }else{
                        this.slideactive=false; this.moveIt(0,ystop); eval(fn)
                }
        }
}
//Initiating the page, making cross-browser objects
function newsMenuInit(){
        oTopMenu=new Array()
        zindex=10
        for(i=0;i<=nNumberOfMenus;i++){
                oTopMenu[i]=new Array()
                oTopMenu[i][0]=new makeNewsMenu('divTopMenu'+i)
                oTopMenu[i][1]=new makeNewsMenu('divTopMenuBottom'+i,'divTopMenu'+i)
                oTopMenu[i][2]=new makeNewsMenu('divTopMenuText'+i,'divTopMenu'+i)
                oTopMenu[i][1].moveIt(0,nImageheight)
                oTopMenu[i][0].clipTo(0,nMwidth,nImageheight+3,0)
                if(!nPlace) oTopMenu[i][0].moveIt(i*nMwidth+nFromleft+(i*nPxbetween),nFromtop)
                else{
                        oTopMenu[i][0].moveIt(nFromleft,i*nImageheight+nFromtop+(i*nPxbetween))
                        oTopMenu[i][0].css.zIndex=zindex--
                }
                oTopMenu[i][0].css.visibility="visible"
        }
}
//Moves the menu
function topMenu(num){
        if(oTopMenu[num][1].y==nImageheight) oTopMenu[num][1].slideDown(oTopMenu[num][2].scrollHeight+20,10,40,'oTopMenu['+num+'][0].clipTo(0,nMwidth,oTopMenu['+num+'][1].y+3,0)','oTopMenu['+num+'][0].clipTo(0,nMwidth,oTopMenu['+num+'][1].y+3,0)')
        else if(oTopMenu[num][1].y==oTopMenu[num][2].scrollHeight+20) oTopMenu[num][1].slideUp(nImageheight,10,40,'oTopMenu['+num+'][0].clipTo(0,nMwidth,oTopMenu['+num+'][1].y+3,0)','oTopMenu['+num+'][0].clipTo(0,nMwidth,oTopMenu['+num+'][1].y+3,0)')
}
//Changes background onmouseover
function menuOver(num){oTopMenu[num][1].bgChange(nBgcolorchangeto)}
function menuOut(num){oTopMenu[num][1].bgChange(nBgcolor)}

//Calls the init function onload
onload=newsMenuInit;
</script>
</HEAD>
<BODY bgcolor="f2f2f2" leftmargin="0" topmargin="0" marginwidth="0" marginheight="0">
<!-- Remember the "news" "key control" and "page contols" text are images, you probably want to change those
with your own images. If your own images have different sizes please adjust the height and clips
of the divs, and change the nImageheight variable in the script. Good luck -->
<div id="divTopMenu0" class="clTopMenu"><a href="#" onmouseover="menuOver(0)" onmouseout="menuOut(0)" onclick="topMenu(0); if(bw.dom || bw.ie4)this.blur(); return false"><img src="images/news.gif" width=101 height=11 alt="" border=0 align="top"></a>
        <div id="divTopMenuText0" class="clTopMenuText">
                Added some link to me buttons and
                advertising info and a new script and a new tutorial.<br><br>
                Remember to join the newsletter!
        </div>
        <div id="divTopMenuBottom0" class="clTopMenuBottom"></div>
</div>

<div id="divTopMenu1" class="clTopMenu"><a href="#" onmouseover="menuOver(1)" onmouseout="menuOut(1)" onclick="topMenu(1); if(bw.dom || bw.ie4)this.blur(); return false"><img src="images/keycontrol.gif" width=101 height=11 alt="" border=0 align="top"></a>
        <div id="divTopMenuText1" class="clTopMenuText">
                1-6=Menu controls<br>
                M=Menuchange<br>
                N=News<br>
                K=Key controls<br>
                P=Page control<br>
                A=Scroll down<br>
                Z=Scroll up<br>
                S=Scriptomania<br><br>
        </div>
        <div id="divTopMenuBottom1" class="clTopMenuBottom"></div>
</div>
<div id="divTopMenu2" class="clTopMenu"><a href="#" onmouseover="menuOver(2)" onmouseout="menuOut(2)" onclick="topMenu(2); if(bw.dom || bw.ie4)this.blur(); return false"><img src="images/pagecontrol.gif" width=101 height=11 alt="" border=0 align="top"></a>
        <div id="divTopMenuText2" class="clTopMenuText">
                Text here.
        </div>
        <div id="divTopMenuBottom2" class="clTopMenuBottom"></div>
</div>
<!-- To add a new menu just copy these lines:
<div id="divTopMenuN" class="clTopMenu"><a href="#" onmouseover="menuOver(N)" onmouseout="menuOut(N)" onclick="topMenu(N); if(ie)this.blur(); return false">HEADING IMAGE GOES HERE</a>
        <div id="divTopMenuTextN" class="clTopMenuText">
                TEXT HERE        
        </div>
        <div id="divTopMenuBottomN" class="clTopMenuBottom"></div>
</div>
And change the letter N to a number higher then the last menu...
(and remember to set the variable nNumberOfMenus in the script to
the same number of menus you have (remember it starts counting
at 0) --><br><br>
</BODY>
</HTML>
Posted by 알 수 없는 사용자
,
아래 태그를 모두 복사해서 태그연습장에서 실행해보세요.

:: 클릭의 경우와 마우스오버의 경우로 만들어졌다.
:: 위 소스는 Thomas Brattli의 사이트에서 발췌하였다.

<html>
<head>
        <title>Cross-browser Dynamic HTML Scripts - LeftTopMenu</title>
<style type="text/css">
#divMenu0{position:absolute; top:0; left:30; visibility:hidden; font-family:arial,helvetica; font-size:18px; font-weight:bold}
#divMenu1{position:absolute; top:200; left:30; width:310; height:100; visibility:hidden; font-family:arial,helvetica; font-size:18px; font-weight:bold}
#divMenu2{position:absolute; top:0; left:150; visibility:hidden; font-family:arial,helvetica; font-size:18px; font-weight:bold}
#divMenu3{position:absolute; top:250; left:30; width:470; height:100; visibility:hidden; font-family:arial,helvetica; font-size:18px; font-weight:bold}

</style>
<script type="text/javascript" language="JavaScript">
/********************************************************************************
Copyright (C) 1999 Thomas Brattli
This script is made by and copyrighted to Thomas Brattli at www.bratta.com
Visit for more great scripts. This may be used freely as long as this msg is intact!
I will also appriciate any links you could give me.
********************************************************************************/
//Default browsercheck, added to all scripts!
function checkBrowser(){
        this.ver=navigator.appVersion
        this.dom=document.getElementById?1:0
        this.ie5=(this.ver.indexOf("MSIE 5")>-1 && this.dom)?1:0;
        this.ie4=(document.all && !this.dom)?1:0;
        this.ns5=(this.dom && parseInt(this.ver) >= 5) ?1:0;
        this.ns4=(document.layers && !this.dom)?1:0;
        this.bw=(this.ie5 || this.ie4 || this.ns4 || this.ns5)
        return this
}
bw=new checkBrowser()
/* Set the variables below.
If you look at the init function you can see that you can also set
these variables different for each menu!
*/

//Do you want the menus to move with the page if the user scroll the page?
var MoveOnScroll=true


//TOPMENU VARIABLES ***********************************************
//How many pixels should it move every step?
var tMove=10;

//At what speed (in milliseconds, lower value is more speed)
var tSpeed=40

//How much of the menu should be visible in the in state?
var tShow=20

//LEFTMENU VARIABLES ***********************************************
//How many pixels should it move every step?
var lMove=10;

//At what speed (in milliseconds, lower value is more speed)
var lSpeed=40

//How much of the menu should be visible in the in state?
var lShow=60


/********************************************************************
Contructs the menuobjects -Object functions
*********************************************************************/
function makeMenu(obj,nest,show,move,speed,topleft){
    nest=(!nest) ? '':'document.'+nest+'.'
        this.el=bw.dom?document.getElementById(obj):bw.ie4?document.all[obj]:bw.ns4?eval(nest+'document.'+obj):0;
          this.css=bw.dom?document.getElementById(obj).style:bw.ie4?document.all[obj].style:bw.ns4?eval(nest+'document.'+obj):0;                
        this.x=(bw.ns4 || bw.ns5)? this.css.left:this.el.offsetLeft;
        this.y=(bw.ns4 || bw.ns5)? this.css.top:this.el.offsetTop;                
        this.state=1; this.go=0; this.mup=b_mup; this.show=show; this.mdown=b_mdown;
        this.height=bw.ns4?this.css.document.height:this.el.offsetHeight
        this.width=bw.ns4?this.css.document.width:this.el.offsetWidth        
        this.top=this.y; this.mout=b_mout; this.min=b_min;
        this.topleft=topleft
        this.moveIt=b_moveIt; this.move=move; this.speed=speed
    this.obj = obj + "Object";         eval(this.obj + "=this")        
}
function b_moveIt(x,y){this.x=x; this.y=y; this.css.left=this.x; this.css.top=this.y}
//Menu up
function b_mup(){
        if(this.y>-this.height+this.show){
                this.go=1; this.moveIt(this.x,this.y-this.move)
                setTimeout(this.obj+".mup()",this.speed)
        }else{this.go=0; this.state=1}        
}
//Menu down
function b_mdown(){
        if(this.y<eval(scrolled)){
                this.go=1; this.moveIt(this.x,this.y+this.move)
                setTimeout(this.obj+".mdown()",this.speed)
        }else{this.go=0; this.state=0}        
}
//Menu in
function b_min(){
        if(this.x>-this.width+this.show){
                this.go=1; this.moveIt(this.x-this.move,this.y)
                setTimeout(this.obj+".min()",this.speed)
        }else{this.go=0; this.state=1}        
}
//Menu out
function b_mout(){
        if(this.x<0){
                this.go=1; this.moveIt(this.x+this.move,this.y)
                setTimeout(this.obj+".mout()",this.speed)
        }else{this.go=0; this.state=0}        
}
/********************************************************************************
Deciding what way to move the menu (this is called onmouseover, onmouseout or onclick)
********************************************************************************/
function moveMenu(num){
        if(!oMenu[num].go){
                if(oMenu[num].topleft=="top"){
                        if(!oMenu[num].state)oMenu[num].mup()        
                        else oMenu[num].mdown()
                }else{
                        if(!oMenu[num].state)oMenu[num].min()        
                        else oMenu[num].mout()
                }
        }
}
/********************************************************************************
Checking if the page is scrolled, if it is move the menu after
********************************************************************************/
function checkScrolled(){
        for(i=0;i<oMenu.length;i++){
                if(!oMenu[i].go){
                        if(oMenu[i].topleft=="top"){
                                y=!oMenu[i].state?eval(scrolled):eval(scrolled)-oMenu[i].height+oMenu[i].show
                                oMenu[i].moveIt(oMenu[i].x,y)
                        }else oMenu[i].moveIt(oMenu[i].x,eval(scrolled)+oMenu[i].top)
                }
        }
        if(bw.ns4) setTimeout('checkScrolled()',40)
}
/********************************************************************************
Inits the page, makes the menu object, moves it to the right place,
show it
********************************************************************************/
function topMenuInit(){
        oMenu=new Array()
        //These used the default variables:
        oMenu[0]=new makeMenu('divMenu0','',tShow,tMove,tSpeed,"top") //Topmenu
        oMenu[1]=new makeMenu('divMenu1','',lShow,lMove,lSpeed,"left") //Leftmenu
        
        //These uses other values
        oMenu[2]=new makeMenu('divMenu2','',20,10,20,"top")
        oMenu[3]=new makeMenu('divMenu3','',70,10,20,"left")
        
        //You can add as many menus you want like the lines above.
        
        scrolled=bw.ns4?"window.pageYOffset":"document.body.scrollTop"
        //Placing and showing menus
        for(i=0;i<oMenu.length;i++){
                if(oMenu[i].topleft=="top") oMenu[i].moveIt(oMenu[i].x,-oMenu[i].height+oMenu[i].show)
                else oMenu[i].moveIt(-oMenu[i].width+oMenu[i].show,oMenu[i].y)
                oMenu[i].css.visibility='visible'
        }
        if(MoveOnScroll) bw.ns4?checkScrolled():window.onscroll=checkScrolled;
}

//Initing menu on pageload
onload=topMenuInit;
</script>
</HEAD>
<BODY bgcolor="f2f2f2" leftmargin="0" topmargin="0" marginwidth="0" marginheight="0">
<div id="divMenu0">
        <!-- You can just replace this text with some cool images if you want -->
        <a href="javascript://">Link1</a><br><br>
        <a href="javascript://">Link2</a><br><br>
        <a href="javascript://">Link3</a><br><br>
        <a href="javascript://">Link4</a><br><br>
        <a href="#" onclick="moveMenu(0); return false">MENU</a>
</div>
<div id="divMenu1">
        <!-- You can just replace this text with some cool images if you want -->
        <a href="javascript://">Link1</a> -
        <a href="javascript://">Link2</a> -
        <a href="javascript://">Link3</a> -
        <a href="javascript://">Link4</a> -
        <a href="#" onclick="moveMenu(1); return false">MENU</a>
</div>
<div id="divMenu2">
        <!-- You can just replace this text with some cool images if you want -->
        This is onclick <br>like the first one <br>
        <a href="#" onclick="moveMenu(2); return false">MENU 3</a>
</div>
<div id="divMenu3">
        <!-- You can just replace this text with some cool images if you want -->
        This is onmouseover, the first one is onclick -
        <a href="#" onmouseover="moveMenu(3)">MENU</a>
</div>

</BODY>
</HTML>
Posted by 알 수 없는 사용자
,
쓸만한데요... 태그 연습장에서 실행해보세요. 아래는 텍스트지만 이미지를 넣어두 상관없습니다.

:: Explorer5 Explorer4 Nascape4 Nascape5 모두의 브라우저 모드에 적용하는 스크립이
   포함되어있다.

:: divCursor: 객체이름.
<style type="text/css">
#divCursor{position:absolute; width:100; height:15;}
</style>  
<script type="text/javascript" language="JavaScript">
function checkBrowser(){
this.ver=navigator.appVersion
this.dom=document.getElementById?1:0
this.ie5=(this.ver.indexOf("MSIE 5")>-1 && this.dom)?1:0;
this.ie4=(document.all && !this.dom)?1:0;
this.ns5=(this.dom && parseInt(this.ver) >= 5) ?1:0;
this.ns4=(document.layers && !this.dom)?1:0;
this.bw=(this.ie5 || this.ie4 || this.ns4 || this.ns5)
return this
}
bw=new checkBrowser()
fromLeft=10
fromTop=10

function cursorInit(){
oCursor=new makeCursorObj('divCursor')
scrolled=bw.ns4 || bw.ns5?"window.pageYOffset":"document.body.scrollTop"
if(bw.ns4)document.captureEvents(Event.MOUSEMOVE)
document.onmousemove=move;
}

function makeCursorObj(obj,nest){
nest=(!nest) ? '':'document.'+nest+'.'
this.css=bw.dom? document.getElementById(obj).style:bw.ie4?document.all[obj].
style:bw.ns4?eval(nest+"document.layers." +obj):0;
this.moveIt=b_moveIt;
return this
}
function b_moveIt(x,y){this.x=x; this.y=y; this.css.left=this.x; this.css.top=this.y}

function move(e){
x=bw.ns4 || bw.ns5?e.pageX:event.x
y=bw.ns4 || bw.ns5?e.pageY:event.y
if(bw.ie4 || bw.ie5) y=y+eval(scrolled)
oCursor.moveIt(x+fromLeft,y+fromTop)
}
onload=cursorInit;
</script>

<div id="divCursor"> <font face="Verdana, Arial, Helvetica, sans-serif" size="1">This will follow the mouse </font></div>

Posted by 알 수 없는 사용자
,
적당한 위치에 아래 소스를 삽입하세요.

<script language="javascript">
<!--
today=new Date()
document.write("오늘 날짜는",today.getYear(),"년",
                            today.getMonth()+1,"월",
                            today.getDate(),"일")
document.write("입니다.")
document.write("현재 시간은",today.getHours(),"시",
                            today.getMinutes(),"분")
document.write("입니다.")
</script>
Posted by 알 수 없는 사용자
,

절대적으로 조절 안되는건 아니고, 일부...;;;

<body onresize="parent.resizeTo(400,400)" onload="parent.resizeTo(400,400)">

Posted by 알 수 없는 사용자
,
<html>

<head>
<meta http-equiv="Content-Type" content="text/html; charset=ks_c_5601-1987">
<title> ♡ 카멜롯™의 태그피아 ♡ </title>
</head>
<script language="JScript">
    function focus() {
                dTutorial.style.visibility="hidden";
                dTutorial.filters.item(0).Transition=23;
                dTutorial.filters.item(0).Apply();
                dTutorial.style.visibility="visible";
                dTutorial.filters(0).play(2);
    }
    function goDhtml() {
                parent.parent.MENU.loadCheck();
    }
</script>
<body topmargin="5" leftmargin="5" style="font-size:9pt" bgcolor="#cccc00" onload="focus();">
<div id="dTutorial" style="position: absolute; width: 257px; visibility: hidden; top: 6; left: 7; filter: revealTrans(Duration=3.0); height: 143px">
  <table style="font-size: 9pt; text-align: justify" cellspacing="0" cellpadding="0" width="284"><tr>
      <td width="282"> ::: 공존의 이유:::<font color="#CCCC00">...................</font>조병화
        <br>
        <br>
        깊이 사랑하지 않도록 합시다<br>
        우리의 인생이 그러하듯이<br>
        헤어짐이 잦은 우리들의 세대<br>
        가벼운 눈웃음을 나눌 정도로 지내기로 합시다 <br>
        <br>
        우리의 웃음마저 짐이 된다면<br>
        그때 헤어집시다<br>
        어려운 말로 이야기하지 않도록 합시다<br>
        당신을 사랑하는 나를 얘기할 수 없음으로 인해<br>
        내가 어디쯤 간다는 것을 얘기할 수 없으며<br>
        언젠가 우리가 헤어져야 할 날이 오더라도<br>
        후회하지 않을 만큼 사랑합시다 <br>
        <br>
        우리 앞에<br>
        서글픈 그 날이 오면 가벼운 눈웃음과<br>
        잊어도 좋을 악수를 합시다</td>
    </tr></table>    
</div>    
</body>    
    
</html>
Posted by 알 수 없는 사용자
,
<html>
<head>
<script language="JavaScript">
<!--
var tInC=null;
var tIdC=null;
var tIdCOn = new Array(0,0,0,0,0,0,0);//버튼하나추가시마다 0을 추가
var tIdCOff = new Array(1,1,1,1,1,1,1); //위와동일

function tBgFIn(obj, col,idNum) {
if(tInC != obj && tInC != null && tIdCOn[idNum] == 0) tBgFOut(tInC,tIdC);
if(tIdCOn[idNum] == 0) {
tIdCOn[idNum] = 1;
tIdCOff[idNum] = 0;
tInC=obj;
tIdC=idNum;
changeColor(obj, col);
}
}
function tBgFOut(obj,idNum) {
if(tIdCOff[idNum] == 0) {
tIdCOff[idNum] = 1;
tIdCOn[idNum] = 0;
changeColor(obj, "#1525a7"); //이부분에 온마우스아웃일시 나타나는색상
}
}
function changeColor(obj, col) {
obj.filters.blendTrans.apply();
obj.style.backgroundColor= col;
obj.filters.blendTrans.play();
}
//-->
</script>
</head>
<body>
<input type="button" value="예제버튼입니다." onClick=""  height="15" onfocus='this.blur()' onMouseOver="tBgFIn(bgColorId0, '#FF9900',0)" onMouseOut="tBgFOut(tInC,tIdC)" onMousedown=this.style.backgroundColor="#4070D0" onMouseup=this.style.backgroundColor="#ff9900" id="bgColorId0" style="background-color: #1525A7;filter: blendTrans(duration=0.5);color:ffffff;">

</body>
</html>

onMouseOver="tBgFIn(①bgColorId0, '②#FF9900',③0)" onMouseOut="tBgFOut(tInC,tIdC)"  id="④bgColorId0" style="background-color: ⑤#1525A7;filter: blendTrans(duration=⑥0.5);">

① bgColorId0 :버튼하나추가시마다번호를0,1,2,3,4....
② #FF9900 :마우스가올라갔을때의색상
③ 0 : ①번과 같은번호를 써주셔야 합니다..
④ bgColorId0 1번관 같은번호
⑤ #1525A7 맨처음 버튼의색깔
⑥ 0.5 색이 바뀌는시간.
onMousedown=this.style.backgroundColor="#4070D0" onMouseup=this.style.backgroundColor="#ff9900"이부분은 임의대로 하시면 됍니다..색상만...  

테이블의 각 칸에 아래와같이 소스를 넣어주시면 된다.
아래의 tBgFIn(bgColorId3, ’#93B380’,3) 에서 #93B380 가 원하는 색상....
duration=0.5은 페이드되는 속도....

<td id=bgColorId1 onmouseover="tBgFIn(bgColorId1, '#93B380',1)"
onMouseOut="tBgFOut(tInC,tIdC)"
style="FILTER: blendTrans(duration=0.5); BACKGROUND-COLOR: #ffffff">
Posted by 알 수 없는 사용자
,
사용자 삽입 이미지


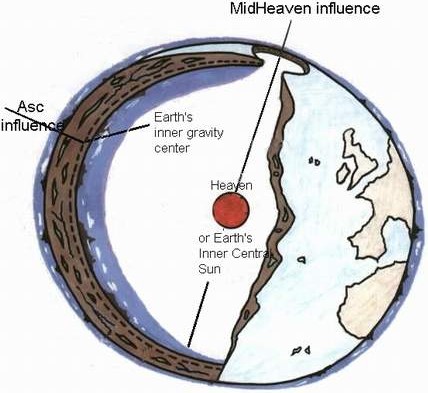
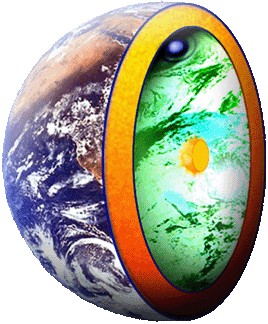
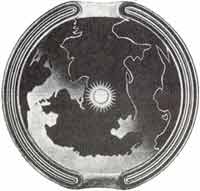
지구 내부 핵심인 중심 태양과
그림으로 표현된 양극의 구멍
사용자 삽입 이미지


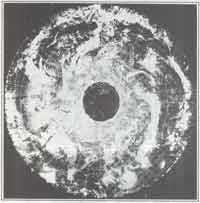
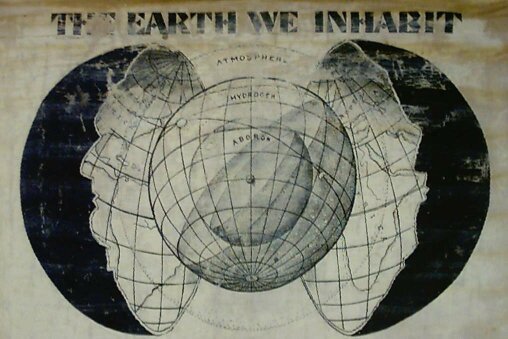
나사(NASA)에서 공개한
지구 북극 위의 위성에서 찍은 사진


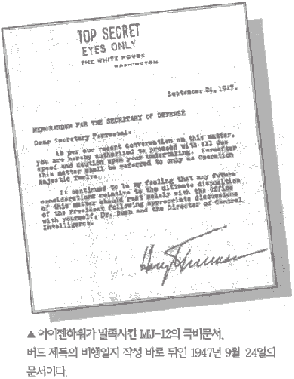
미 펜타곤 50년간의 비밀문서= 리차드 버드 의 지구속 비행일지


사용자 삽입 이미지

미국 초대 남극 개척대장을 지낸
리차드 E. 버드( Richard E. Byrd 1888~1957) 해군제독

1947년 2월 19일 북극 베이스 캠프에서

출발해 지구 속, 1,700마일(약 2,720km)

을 비행해 들어가
지구 속 문명세계와 접하고 귀환한 뒤,
미 국방성에 보고하기까지의 사실을
객관적으로 기록한 비행일지이다.
원제는
[북극너머 지구 속으로의 비행-리차드 E. q버드 제독의 행방불명된

비행일지(The Missing Diary of Admiral Richrd E. Byrd)]이다.

지구 속 문명세계를 직접 경험한 역사상 인물은 1829년 북극해의 해류에

떠밀려 북극의 열려진 구멍(굴뚝)을 통해 지구내부에서 2년 반을 살다나온 옌스 얀센(Jens Jansen) 올랍 얀센(Olaf Jansen 1811-1906) 부자와  1947년 2월 19일 북극 베이스캠프에서 출발, 북극너머 1,700마일

을 비행 해 들어가 지구 속 문명인과 회견까지 하고 그들의 메시지를

가지고 온『비행일지』의 저자 버드 제독 세명 명뿐이다.

올랍 얀센 탐험기록 은 이미『지구 속 문명(원제: The Smoky God and other Inner Earth Mysteries)』이란 타이틀로

국내에 소개된 바 있지만, 독자들 대부분이 신기하기는 하나 도저히 믿어지지 않으며 책 내용이      사실인지  알쏭달쏭하다는 반응을 보였다.

그러나 일단 버드 제독의 비행일지를 한번 읽고 나면
지구 속 문명이 존재한다는 사실에 더 큰 충격과 당혹감을 느끼게

된다.
그것은 이 비행일지 내용이 올랍 얀센이 전하고 있는 지구 속 문명의

정보 와 너무 똑같을 뿐만 아니라 외계문명권에서 전해주는

메시지와도 부합되기 때문이다.


뿐만아니라 펜타곤(미 국방성)에서 50년 동안 극비문서로 취급되어

공개가 금지된 문서가 근래에 와서 공개된 사실만 보더라도
인류에게 줄 충격이 어느정도인지 가히 짐작할 만 하다고 생각된다.

또한  지구 속 문명인으로부터 고등수학으로 이루어진 전파 암호

수신하고 있다는 1997년 NASA의 발표는, 한 NASA 과학자의 논평 그대로  기존의 세계관과 우주관을 송두리째 뒤집어야 할 20세기 최대의 충격이 아닐 수 없다.


- 지구공동설 관련자료 -

*헬리 의 의견

지구공동설의 학계 최초의 주장은 헬리혜성을 발견한 헬리가 1962년에 주장했다.

*공동연구가의 의견

공동연구가들은 모든 천체는 구멍이 나있고 속은 텅 비어있다라고 한다.
그것은 행성이 탄생할 때 소용돌이 운동에 의해 이루어진다고 하는데 축을 중심으로 회전하는 행성은 원심력에 의해서 그 내부 구조가 도넛과 같이 텅 비어 있다는 것이다.

*파스칼 조단 (Pascual Jordan)의 의견

파스칼 조단 (Pascual Jordan)은 1971년에 [팽창하는 지구]에서 대륙 이동을 지구 팽창의 단서로 보고 같은 용적이 팽창하기 위해서는 지각 내부에 공동 이 생겨나야 한다고 주장한다.
그리고 현재 지각 두께는 약 170마일에 불과하며 속 빈 구형(球形)의 지구는 함몰 부나 개구부가 생겨나지 않는 한 무한정 팽창할 수 없으며 이것들은 지구 자전축 가까운 양극 지각에 정확한 회 전 대칭의 중심이 되어 생겨났을 것이라 말한다.

*오일러의 의견

스위스의 유명한 수학자이자 물리학자로 오일러 방정식을 만든 오일러는 "지구 안에는 3개의 천체가 있다" 라는 헬리의 주장에  "지구속 태양 은 오직 하나뿐이다" 라고 주장


*지구공동설 의 또다른 의견

R.티드 제시한 다른 타입의 지구공동설:티드의 《세포우주론》에 의하면 우리들이 사는 세계는 지각 바깥쪽에 있으며, 공동내부에 떠 있는 별들과 행성을 둘러싸듯이 펼쳐져 있다.
이러한 이론을 바꿔 해석하자면 지구는 표면과 핵 부분이 딱딱한 층으로 구성되어 있으며 그 사이 공간은 비어있다는 이론이다.

지구의 겉면적은 51,010만 km2이고 무게는 6 × 10¹⁷만톤이다.

그런데 지구가 속이 꽉 차 있을 경우 실제 중량은 이보다 훨씬 무거워야 한다. 지구의 무게가 적게 나오는 이유는 바로 지구 내부가 비어 있다는것.. .


이외에도 옛 독일의 과학자 이골 슈메트 는 "지구의 북극과 남극에는 1년에 3번씩 커다란 문이 열리게 되어있고 지구안 에는 아갈타 라 불리우는 또 하나의 세계가 있다" 고 한다.


사용자 삽입 이미지


지구공동설에 대한 명확한 증거는 없다. 하지만 지구가 그속에 핵과 맨틀 로 이루어졌다는 지금의 지식에도 뚜렷한 증거는 없다. 지구 아래로 땅을 뚫어보지도 못했으며 그 속에 무엇인지 정확히 알수없다.


                          지구도 살아숨쉬는 거대한 대 생명체 다

우리 생명체가 속이 비어야 생명활동을 하듯

  지구 또한 그렇지 않을런지 ....


↓ 참고: 예전 백만불 미스테리에서 방영된 지구공동설 영상자료 ↓

http://dory.mncast.com/mncHMovie.swf?movieID=10001773620070527165700&skinNum=1


사용자 삽입 이미지
 
사용자 삽입 이미지
Posted by 알 수 없는 사용자
,
UFO는 과연 어디에서 왔는가!

히틀러의 죽음, 그 속에 감춰진 비밀은?

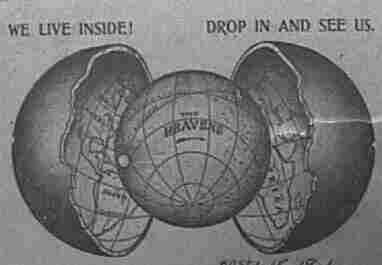
저러한 의문에 대한 답을 내놓는 사람들 가운데 주장하는 한가지가 있습니다. 바로 '지구공동설'이라는 것입니다. 지구공동설이란 말 그대로 우리가 사는 이 지구는 속이 비어있다는 것입니다.
 

사용자 삽입 이미지

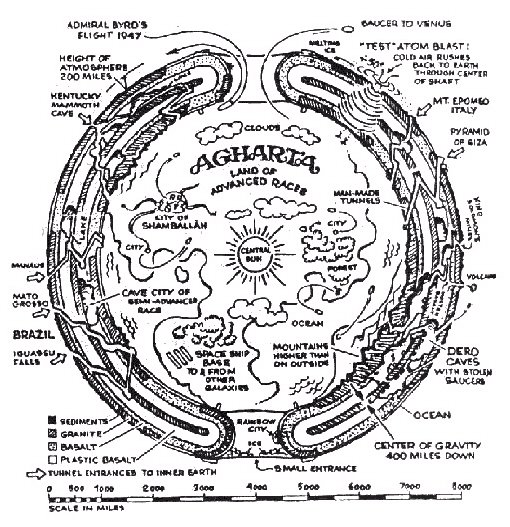
즉, 이렇게 생겼다는 말이 됩니다.

물론 지구공동설에도 다양한 주장이 있지만 가장 그래도 쓸만해 보이는건 저런 상상도입니다. 주장의 근거를 들기전에 조금 더 설명을 드리자면

지상인들은 태양을 근원으로 살아간다 그렇다면 지하인들은? 생성당시 아주 무거운 것들은 인력의 영향으로 가운데로 모여들어 불타오르게 되었다. 바로 그게 핵이다. 따라서 핵을 제 2의 태양 삼아 살아간다.
이러한 지하에는 매머드도 살아있으며 과거 빙하지역에서 발견된 매머드는 길을 잃은 매머드가 헤매다가 밖으로 나와 얼은 것이다. 남극과 북극에는 어떤 특정한 시기에 얼음이 갈라져 길이 열리며 거대한 통로가 생긴다.

사용자 삽입 이미지


재미있는 발상입니다. 그림을 보시면 물론 가능할 수도 있는 것이 보입니다. 우선 핵을 태양삼아 살아간다는게 가장 마음에 드는군요. 물론 밤이 없는 세상이겠죠.
이러한 지구공동설의 주장을 하는 사람들이 드는 근거로는 다음과 같은 것들이 있습니다.

- 북극에 동물들은 겨울철이 오면 남쪽으로 내려오는 것이 아닌 북쪽으로 이동한다. 따라서 그쪽 어딘가에 따뜻한 지역이 나오는 것이 아닌가.

- 남극과 북극을 탐험하던 사람들이 붉은색, 노란색 등의 눈이 내리는 것을 보았던 사람이 있으며 그 눈 색이 그러한 이유는 꽃가루 때문이다. 그런데 남극과 북극에는 그렇게 대량으로 꽃가루가 날릴 지역이 없으니 지구내부에서 날려온 것이다.

- 인공위성을 찍었을 때 극점에 구멍과 같은 것이 나타난 적이 있다. 정부는 그것을 알면서도 감추는 것이 아닌가.
<지구속 내부의 환경>  
하루에 약 30분씩 적절하게 비가 내리며, 모든 농작물, 식물들이 크고 풍성하게 자란다. 포도송이 들은 길이가4-5피트(122-152cm)이고 각각의 포도알은 오렌지 만큼 크고, 지구 내부에서 가장 잘 자란다는 사과는 사람 머리보다 크다..
얀센은
지구내부의 도시인 ye hoo, nigi, delft, heck-tia 도시를 방문 했는데 보통 높이가 30m~240m나 되는 나무숲이 해변가 숲을 채우고 있는 것을 보았다고 증언 한다.

북극 탐험가들은 어디에서인지 모르지만

시베리아에는 없는 오색 찬란한 꽃가루 등이 극지방을

수놓는다는 것은 여러번 들어서 알고 있을 것입니다

몇몇 새들은 날개를 펴니, 양날개의 길이가 9m정도이고,

알 크기가 60cm이며, 거북이의 크기는 7.6-높이가 4m

정도로 아주 크고 높았다고 한다.

Posted by 알 수 없는 사용자
,
사용자 삽입 이미지

'피겨요정' 김연아도 MBC 인기 오락 프로그램 '무한도전'팀과 마침내 만남을 갖는다.

김연아는 오는 18일쯤 서울의 한 아이스링크에서 유재석, 박명수, 정준하, 정형돈, 노홍철, 하하 등 '무한도전' 멤버들과 함께 녹화에 임할 예정이다.

김연아의 매니지먼트를 담당하고 있는 IB스포츠의 한 관계자는 12일 스타뉴스와 전화통화를 갖고 "평소 '무한도전'의 팬이기도 한 김연아와 '무한도전' 멤버들과의 만남이 이번에 마침내 이뤄지게 됐다"고 밝혔다.

이어 "김연아의 여러가지 모습을 '무한도전'을 통해 볼 수 있게 될 것"이라고 전했다.

김연아의 '무한도전' 녹화는 비공개로 진행될 예정이며, 아직까지 방송일자는 확정되지는 않은 것으로 알려졌다.

한편 '무한도전'에는 골프 선수 미셸 위, 테니스의 요정 마리아 샤라포바, 축구 스타 티에리 앙리 등 스포츠계의 세계적 스타들이 이미 출연했다.


'피겨요정' 김연아가 14일 공연을 펼칠 예정이었던 서울 목동 아이스링크 경기장에 화재가 발생하면서, 오는 18일경으로 예정된 MBC 오락 프로그램 '무한도전' 촬영 강행 여부에도 관심이 쏠리고 있다.

김연아는 14일 오후 7시30분부터 서울 양천구 목동 아이스링크 경기장에서 열릴 '현대카드 슈퍼매치 v-07 슈퍼스타스 온 아이스' 공연에 나설 예정이었다. 그런데 이날 오전 11시50뿐쯤 목동 아이스링크 경기장 지붕에 불이 나면서 공연 지속 여부가 불투명해진 것.

김연아가 리허설을 위해 목동 아이스링크 경기장을 찾기 직전 일어난 이번 화재는 방수용 모르타르 작업 도중 발생했으며, 긴급 출동한 소방대의 진압으로 20여분 남짓 만에 진화됐다. 하지만 경기장 지붕의 절반 가량이 불에 타면서 이날 오후 2시30분 현재 공연 기획사 측이 공연 개최 여부를 놓고 논의를 거듭하고 있다.

올 여름 내내 캐나다에서 전지훈련을 갖다 이번 공연 참석을 위해 지난 10일 귀국한 김연아이기에 혹시라도 메인 공연이 취소될 경우, '무한도전' 녹화 참여 등 후속 일정에 차질을 줄 수 있을 것이라는 의견이 일각에서 제기되고 있기도 하다.

이와 관련, 김연아의 매니지먼트를 담당하고 있는 IB스포츠의 한 관계자는 14일 오후 스타뉴스와 전화 통화를 갖고 "김연아는 이번 화재와 관계없이 당초 계획대로 '무한도전' 녹화에 나설 것"이라고 밝혔다. 이 관계자에 따르면 김연아 측과 '무한도전' 측은 아직까지 촬영장소를 확정하지 않은 상태이다.


피겨요정 김연아, 무한도전 출연 “어떤 모습?” 기대만발
(이타임즈 2007-09-12)
(리뷰스타 황유영 기자) 지난 10일 귀국한 피겨요정 김연아가 무한도전에 출연한다.국민 여동생이라 불릴 만큼 폭 넓은 사랑을 받고 있는 김연아와 높은 인기를 얻고 있는 MBC 예능 프로그램 무한도전이 특별한 만남을 가질 예정이라고 알려져 팬들의 기대를 높이고 있다

» 무한도전 김연아, 두 마리 토끼 다잡는 김연아를 기대한다
(데일리 서프라이즈 2007-09-12)
▲ 피겨요정 김연아 선수 ⓒ 김연아 공식 홈페이지 한국이 낳은 피겨스케이팅 스타 김연아가 무한도전 에 출연한다고 한다. 9월 14일부터 3일간 펼쳐지는 현대카드 슈퍼매치 V 아이스 쇼 에 참가할 목적으로 지난 10일 귀국한 김연아가...

» 김연아 “종달새가 되어 날아볼래요”
(중앙일보 2007-02-18)
최근 병원을 바꿔서일까? 아니면 아픔을 담담히 견뎌 낸 연아의 당찬 성격 때문일까? 전국 체전을 2주도 채 남기지 않고 그녀의 몸이 가뿐하다. 그토록 원하던 종달새가 되어 링크 밖으로 날아갈 것처럼 연아의 점프는 높고 유연하다.
Posted by 알 수 없는 사용자
,
사용자 삽입 이미지

배기성의 실제 나이가 방송에서 밝혀졌다.

캔의 배기성은 지난 14일 방송된 MBC 드라마넷 '삼색녀 토크쇼'에 멤버 이종원과 함께 출연했다. MC 김원희가 '스타토크 누나야' 코너를 시작하기 앞서 캔 멤버의 프로필을 소개하던 중 대본에 적힌 생년월일을 본 뒤 "이거 정정해도 되나요?"라고 운을 똈다. 이어 "배기성 씨 74년생으로 되어 있는데 72년생이시죠?”라며 뜨끔한 질문을 던졌다. 평소 캔과 친분관계가 있는 김원희가 나이를 정확히 알고 있었던 것. 이에 배기성은 변명 한마디 제대로 못한채 순순히 “네”라고 인정하는 모습을 보였다.

아울러 멤버 이종원의 실제 나이도 밝혀졌다. 프로필에는 72년생으로 되어있지만 실제로는 70년생이었던 것. 배기성은 “캔을 결성할 당시에 똑같이 2살씩만 내리자고 했다”고 당시의 상황을 전했다.

예전에도 김창렬이 '삼색녀토크쇼'에 출연, 실제나이를 밝혀 화제가 된 바 있다. 데뷔 시절 75년생이라고 속인 김창렬은 실제로는 73년생이었다. 여가수 제이 또한 데뷔시절에 나이를 한 살 속였고 실제로는 1977년생이라고 솔직히 밝힌 바 있다.

김원희는 “배기성 씨와 나는 동갑인데 옛날에는 나한테 누나라고 하더라”고 폭로해 스튜디오를 발칵 뒤집었다. 이에 배기성은 “신인이니까, 신인 때는 누나가 아니어도 그냥 다 누나라고 했다”며 변명 아닌 변명을 늘어놔 스튜디오에 폭소를 몰고왔다. 김원희는 “처음 만날 때 74년생으로 알아서 그런지 지금도 배기성을 보면 동생같다”는 뜻을 전해 눈길을 끌기도 했다.

Posted by 알 수 없는 사용자
,
BREATH TAKING 숨을 멎게한다
by sohcit2me (movies profile) Sep 14, 2007
1 of 1 people found this review helpful

all i can say is wow, this movie was awsome. CG in this movie was killer. Transformers was nothing compared to this movie. Although acting wwas pretty dull in this movie, like the other review said, it should conflict with getting the pure enjoyment from this movie. Story plot was okay, but man... the graphics was AWSOME. its a must see

와 끝내주는 영화다 CG는 죽음이다 트랜스포머는 디워에 비교가 안된다

연기는 좀 그렇지만


Overall Grade: A+
Story: A+
Acting: A+
Direction: A+
Visuals: A+
Simply great 한마디로 대단하다
by karrazzy (movies profile) Sep 14, 2007
1 of 1 people found this review helpful

This movie was simply great. A must see. I got my tickets for free, but I would spend money to see it a second time.


대단한 영화 꼭 봐야되는 영화다 공짜표를 얻었지만 두번째 볼땐 돈을 내고 봐야겠다


Wow,,
by withyou0413 (movies profile) Sep 14, 2007
1 of 1 people found this review helpful

other people talk about story, but actually even transfomer's wasnt good enough. because this is SF movie, this is enough and the graphics are...well, i got nothing to say but great. im pretty shoucked that this is Korean movie. overall, must see.

사람들은 스토리가 어떻다 하지만 솔직히 트랜스포머도 그렇게 좋은건 아니었지

SF로서 이 정도 스토리면 충분하고 CG는 대단하다는 말밖에는 할말이 없다

이게 한국영화라니 충격이로다


Overall Grade: A+
Story: A+
Acting: A+
Direction: A+
Visuals: A+
mostest superest movie ever  최고로 탁월한 영화
by dialamatic (movies profile) Sep 14, 2007
This is the best movie ever made. I have not seen this movie therefore I am as qualified to rate this
movie as many of the other reviewers here.


bad movie 별로다
by asojuaco (movies profile) Sep 14, 2007

this is really bad movie. the effect are mediocre. acting is really reaaly bad. not worth my time. should've done other things than watch this movie.


영화 정말 아니다 특수효과는 그저그렇고

연기는 꽝이다 시간이 아깝다 이 영화 볼 시간에 다른걸 했어야 했는데


Greatest movie ever 최고의 영화
by win0419b (movies profile) Sep 14, 2007
1 of 2 people found this review helpful

I can't believe this. It full of uniqueness and pride of directer own. It deserve all oscar award, including short animation award. It is better than citizen kane and jurassik park.

Virtue of this movie is deus ex machina. you can watch deus ex machina every all the time in this movie. No moment is not related to deus ex machina.

And victory to professor jin!


믿을수 없다 감독의 개성과 프라이드가 가득한 영화! 오스카상을 받아야 마땅하다

시민케인 쥬라기 공원보다 더 낫다

Posted by 알 수 없는 사용자
,
사용자 삽입 이미지

‘발라드의 여왕’ 가수 이수영이 1년 8개월 만에 8집 ‘내려놓음’으로 컴백했다.

특히 이수영은 컴백 첫 무대를 병원이라는 곳으로 선택, 큰 관심 속에서 화려하게 모습을 드러냈다.

12일 서울 연세 세브란스병원 6층 은명대강당에서 컴백 쇼케이스를 가진 이수영은 “오랜만에 인사를 드리려니 설레고 감격스럽다”면서 첫 인사를 전했다.

특히 이수영은 “컴백하는데 시간이 본의 아니게 오래 걸렸다”면서 “불미스러운 일도 있었고... 그렇지만 그런 시간들이 나에게는 큰 도움이 됐다”고 감격스러워했다.

이수영은 “오랜 시간 준비해 이 자리에 온 만큼 앞으로 오래오래 열심히 활동하는 모습을 보여드리고 싶다”는 바람을 전하기도 했다.

이날 쇼케이스에서 이수영은 8집 타이틀곡 ‘단발머리’를 비롯한 ‘사랑이 다 그렇지’ 등의 신곡과 ‘GRACE’ 등 자신의 히트곡을 선보였다.

특히 절친한 동료인 가수 이효리, 박경림, 이기찬, 장나라가 참석해 응원하기도 했다.

한편 이수영은 1년 8개월 만에 8집 ‘내려놓음’으로 컴백, 이날 ‘이수영과 함께 하는 내일의 아이들’이라는 타이틀의 쇼케이스를 시작으로 본격적인 활동에 돌입한다.

사용자 삽입 이미지
Posted by 알 수 없는 사용자
,

사용자 삽입 이미지


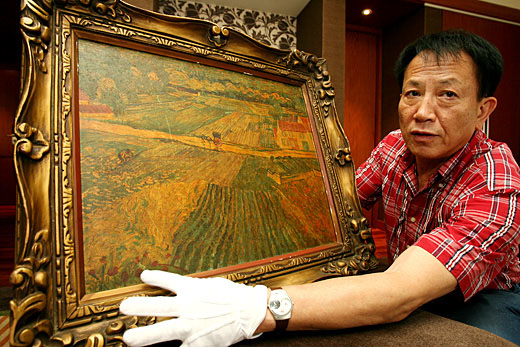
세계 최고가다. 물경 3000억원이다.

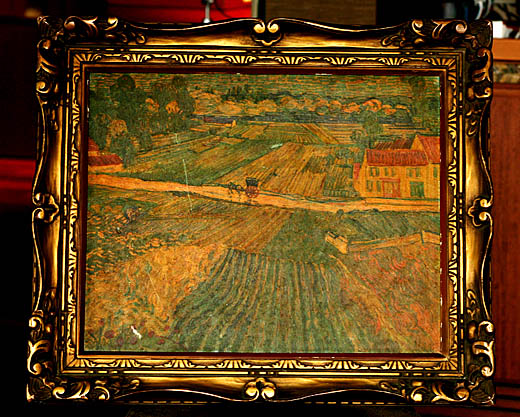
불운했던 천재 화가 빈센트 반 고흐가 남긴 진기한 템페라(수채화) 작품으로 한국인이 한국에서 소유하고 있는 것으로 밝혀져(본지 7월 11일치 2면 참조) 관심을 모은 '마차와 기차가 있는 풍경'이 세계 미술품 '큰손'들로부터 천문학적 금액을 제시받고 있다.

1억 6000만 달러(약 1500억원)~3억 달러(약 2800억원), 그야말로 믿기 힘든 금액으로 '구애'의 정도를 쉽게 느낄 수 있다. 고흐의 템페라 가운데 실재와 소재가 파악된 세계 최초의 그림으로 당초 1000억원 정도로 추정됐던 금액을 훌쩍 뛰어넘는다.

"3억 달러도 아깝지 않다"며 선뜻 구입 의사를 밝히고 나선 이는 러시아의 한 부호다. 아직 이름까지 밝히기를 꺼리고 있지만 독일의 한 대리인을 통해 소장자(서병수) 측과 접촉, 강한 러브 콜을 보내고 있다. 이 부호는 "(만나서 상담할 수 있는) 일정을 잡아 달라. 언제든지 달려가겠다"라고 할 만큼 적극적이다.

또한 이 작품이 워낙 가치가 높아 언제 팔릴지 모르는 점을 우려해서인지 지난 12일 보낸 메일에서는 "10일 동안은 팔지 않겠다는 각서를 써 달라"고 요구했다. 서병수씨 측은 "무리한 요구"라며 대신 최우선권을 주겠다고 답장을 보냈다.

러시아 측에 못지않게 적극적으로 구입하고 싶은 뜻을 밝힌 곳은 중국의 한 투자회사다. 이 회사가 제시한 금액은 13억 위안(1600억원)이다.

이 회사는 이와 함께 합작 의사를 타진하며 합작의향서를 보내 왔다. 베이징역 앞 개발에 함께 참여하자는 것. 서씨 측은 이 제안에 대해 "합작 투자는 생각이 없다"며 완곡하게 거절 의사를 밝혔다.

사용자 삽입 이미지

중동의 한 부국 왕실도 구입 경쟁에서 전혀 뒤질 생각이 없다. 이 왕실은 한국의 지인을 통해 서씨 측과 만나 구입 의사를 밝혔다. 구체적 금액은 제시하지 않았으나 금액에 구애되지 않고 잡고 싶다는 뜻을 밝힌 것으로 해석된다. 이번 주말이나 다음주 초 국왕의 동생을 보내 협상을 갖고 싶다는 의사를 밝혀 왔다.

미국의 미카도펀딩그룹도 구매 전선에 뛰어들었다. 이 그룹은 스웨덴의 이케아그룹과 손잡고 1억 6000만 달러를 제시하고 있다.

이 밖에 일본 최고 수준의 박물관 두 곳을 갖고 있는 굴지의 기업인 브리지스톤과 세이부그룹도 큰 관심을 갖고 사람을 보내 구입을 타진하고 있다.

한편 서씨는 "아직까지 한국에 남겨 한국인의 긍지를 살리고 싶다는 뜻에는 변함이 없다. 돈에 흔들리지 않고 신중하게 협상을 진행하겠다. 천하의 명품을 간직할 수 있는 진실된 사람에게 갔으면 한다"라고 말했다.

Posted by 알 수 없는 사용자
,
사용자 삽입 이미지
개그맨 정준하씨 기자회견

(서울=연합뉴스) 김영현 기자 = '술집 불법 운영 논란'에 휩싸인 개그맨 정준하가 일단 MBC TV '무한도전'에 계속 출연한다.

최영근 MBC 예능국장은 "지금으로서는 정준하 본인의 말을 믿을 수밖에 없는 상황이기 때문에 '무한도전'의 출연에서 제외하는 것은 고려하지 않고 있다"고 14일 말했다.

최 국장은 "정준하와 관련된 상황을 주의 깊게 지켜보고 있는데 보도만을 보면 분명히 논란이 있을 수 있는 문제"라면서 "이럴 때는 사실관계가 중요한데 우리는 현재 본인의 말을 믿을 수 밖에 없는 상황"이라고 덧붙였다.

이어 "본인이 '아니다'라는데 억지로 '그렇지 않냐'면서 하차시킬 수는 없는 노릇"이라면서 "일단은 상황을 더 지켜보기로 했으며, 이번 문제와 관련해 새로운 사실이 더 나타나면 하차 여부를 그때 다시 고려할 수 있다"고 설명했다.

정준하는 최근 자신이 운영에 참여한 술집에 여성 접대부가 고용됐다는 내용을 한 인터넷 매체가 보도하면서 논란에 휩싸였다. 이에 14일 기자회견을 열고 "해당 술집의 지분을 갖고 있지 않으며 나는 단순한 얼굴마담 격이라 술집 운영 상황에 대해서는 모른다"며 "그곳에서 여성접대부를 고용했다는 이야기는 믿을 수 없다"고 밝혔다.

이에 대해 네티즌들은 정준하의 도덕성을 문제 삼아 그가 출연하고 있는 '무한도전' 등에서의 하차를 주장하는 쪽과 정준하를 옹호하는 쪽으로 나뉘어 온라인에서 격론을 벌이고 있다.

Posted by 알 수 없는 사용자
,